RAK 7268 V2
Step 1
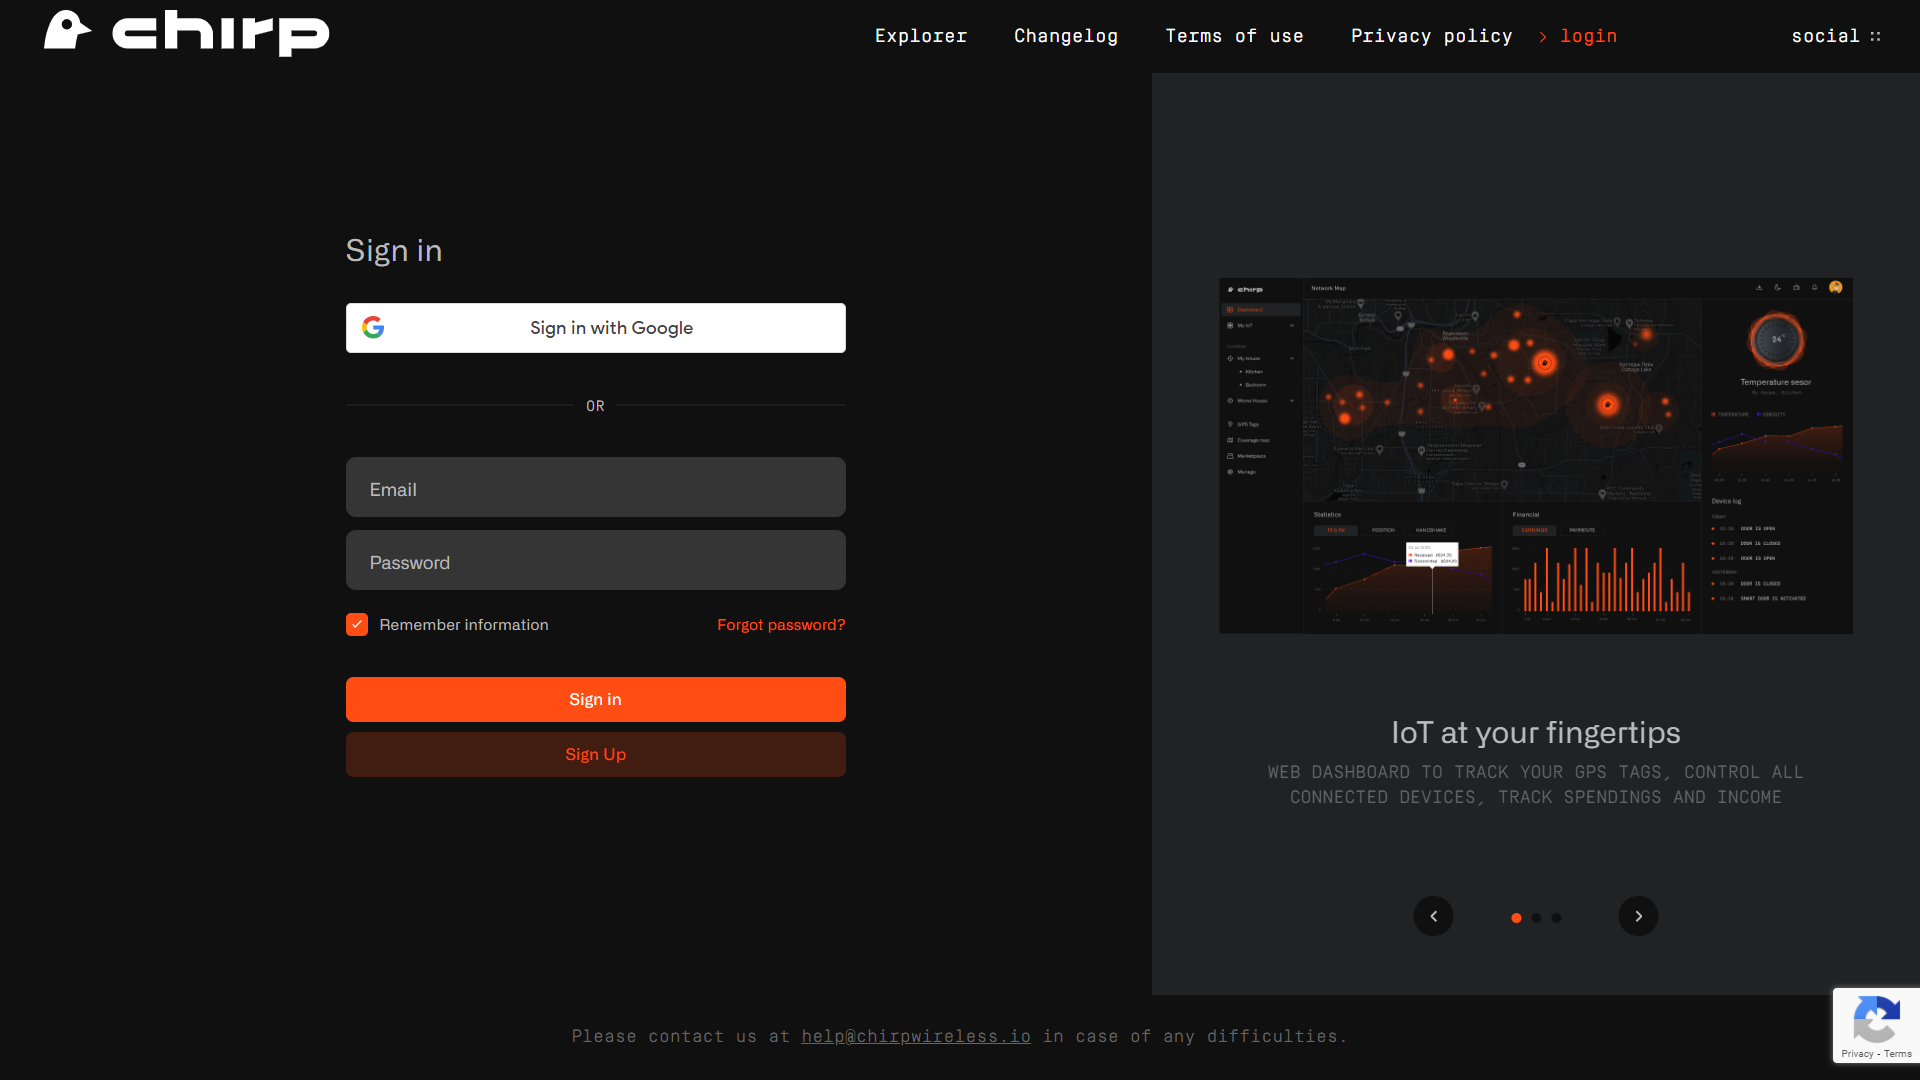
Log in to your dashboard at https://app.chirpwireless.io.
Step 2
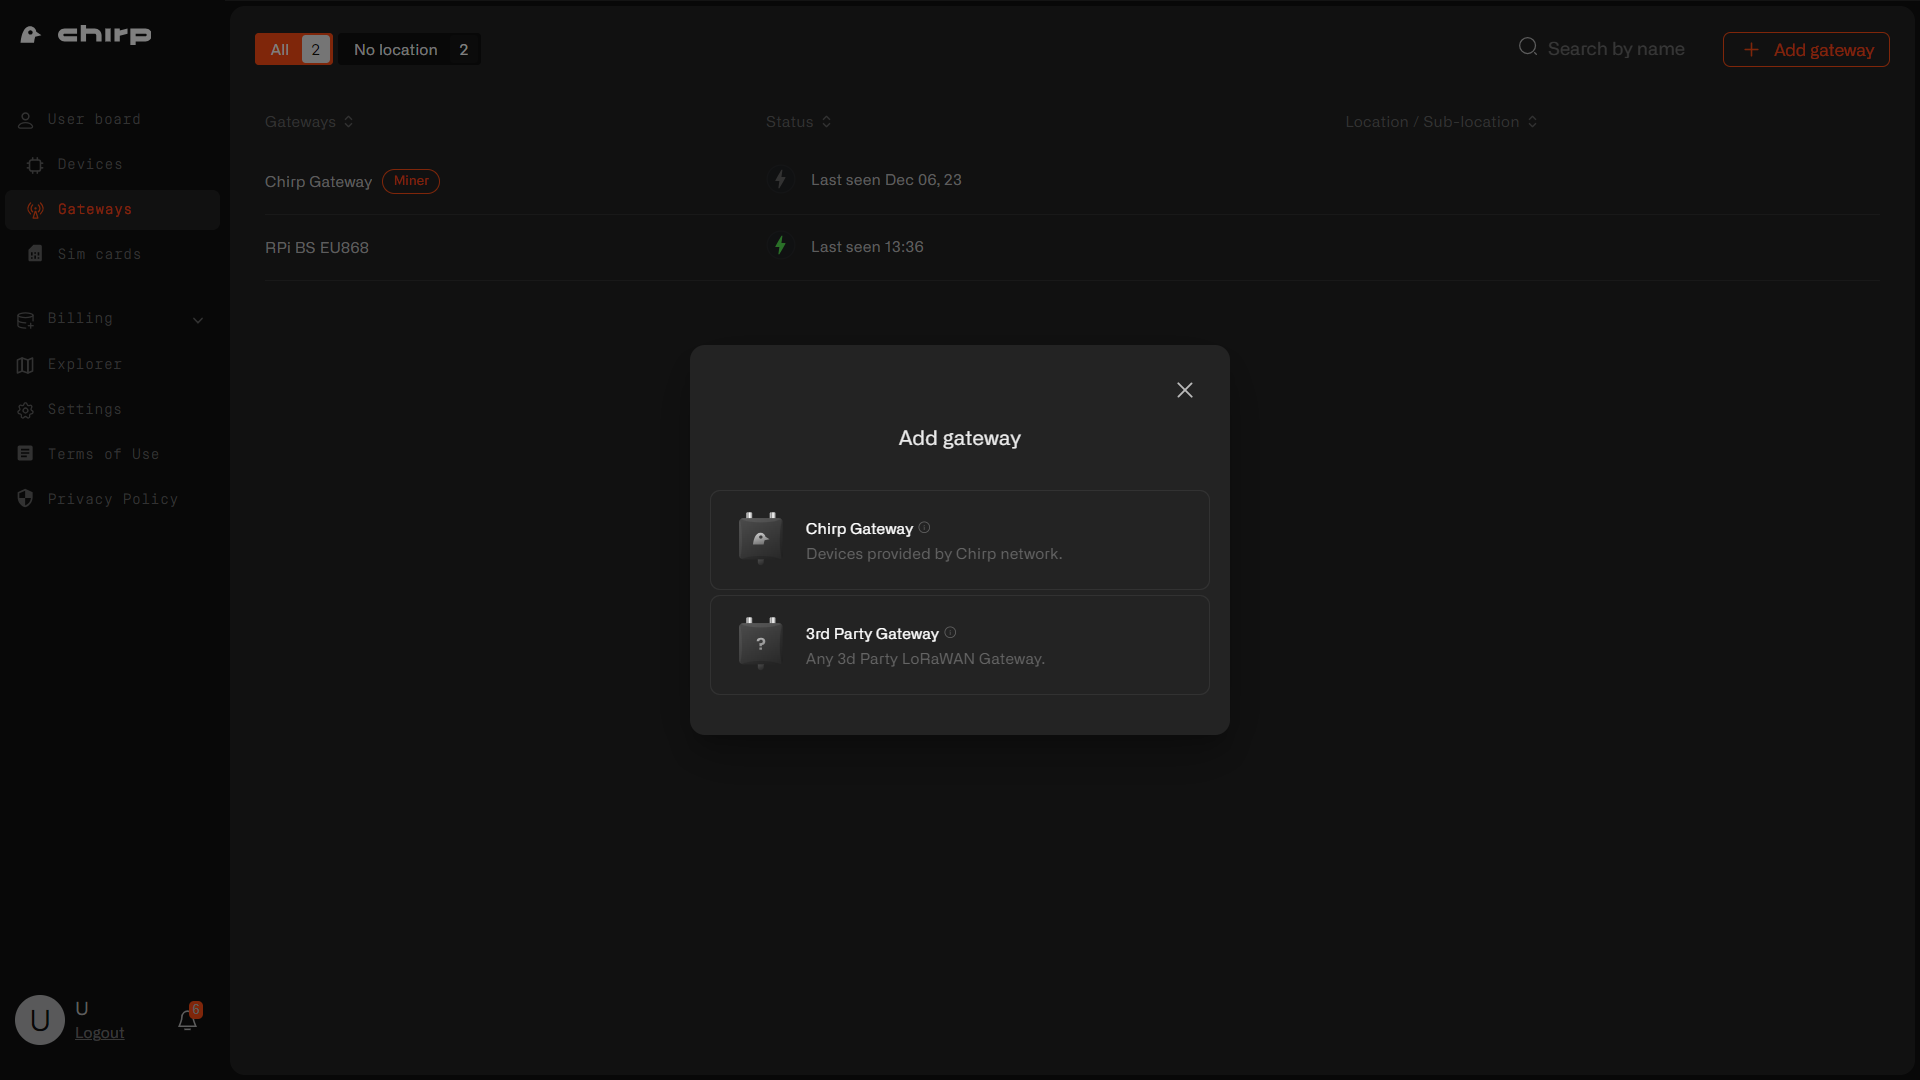
Once logged in, click on "Gateways" in your dashboard. Select "Add gateway" in the upper right, click on "3rd Party Gateway".
Step 3
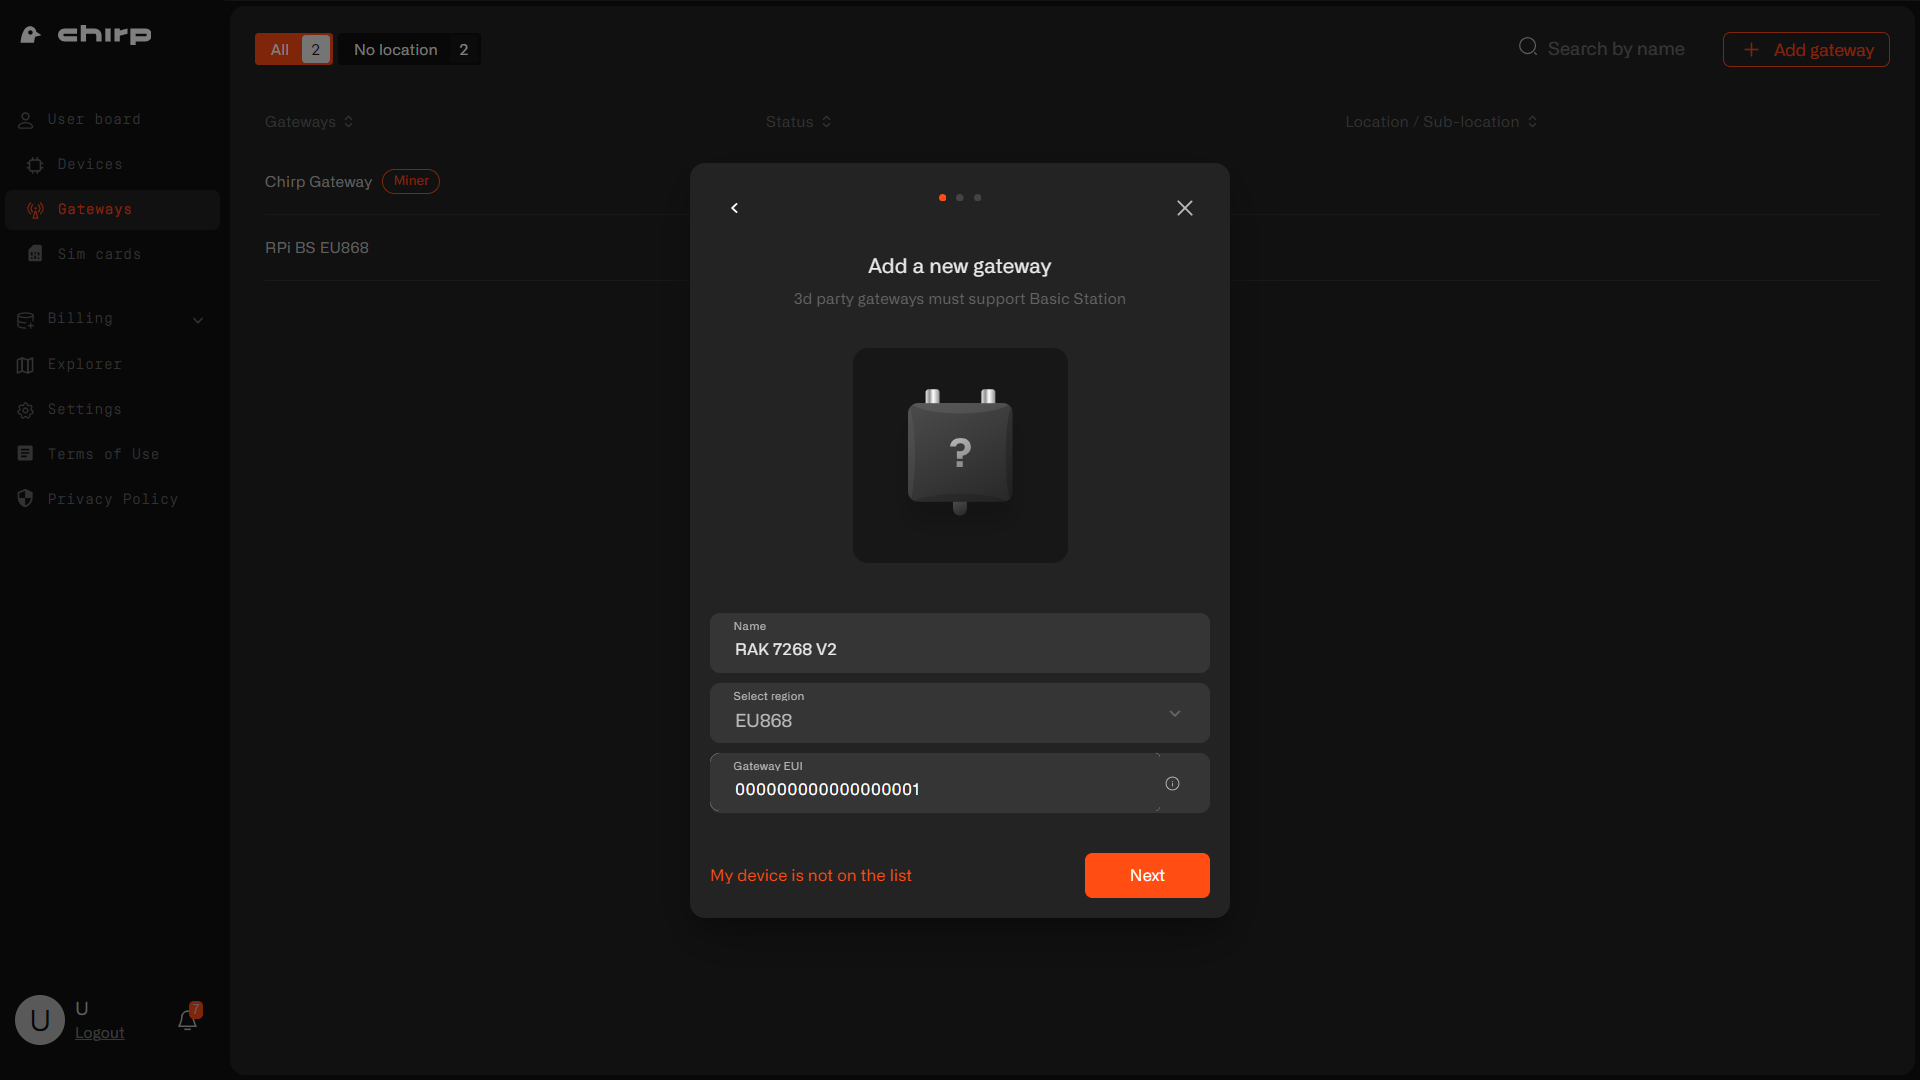
Enter the Gateway Name, select your country's LoRaWAN frequency band and input the Gateway EUI (located on the back of the gateway). Click Next.
Step 4
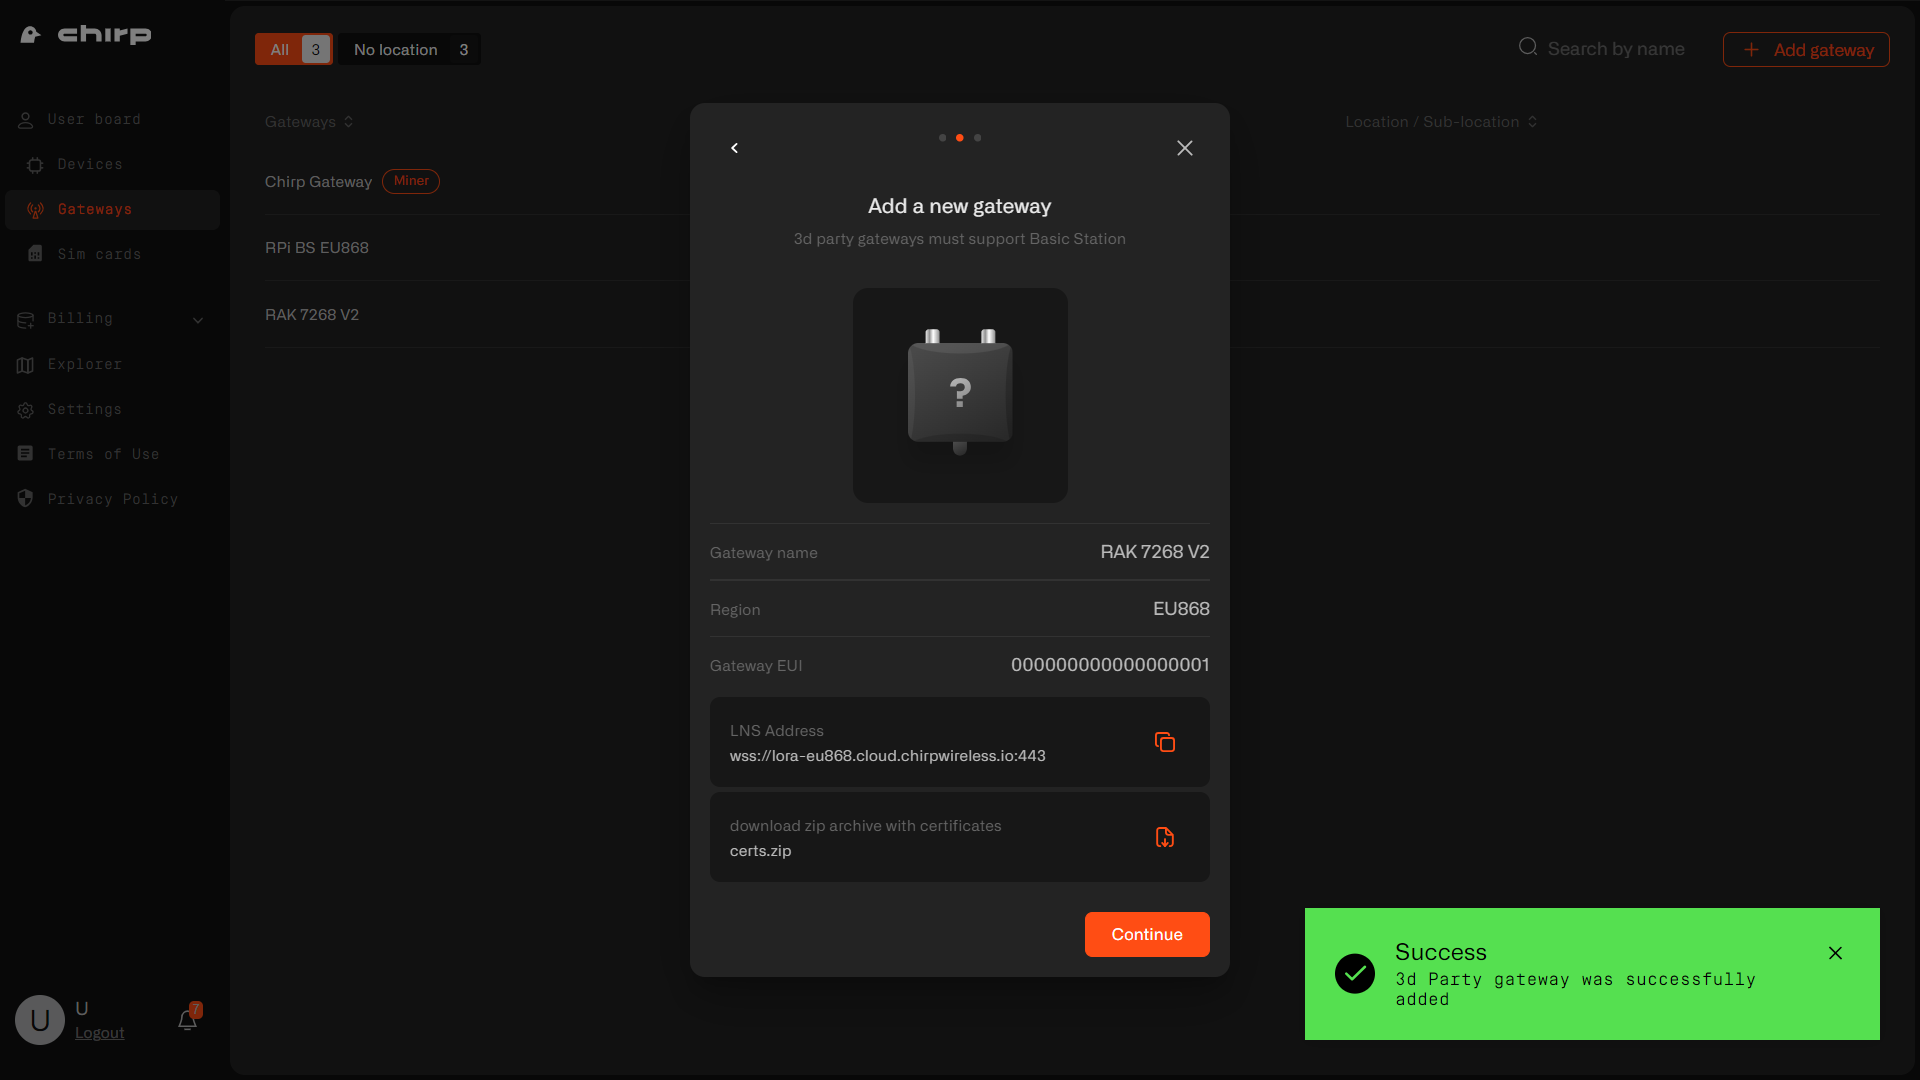
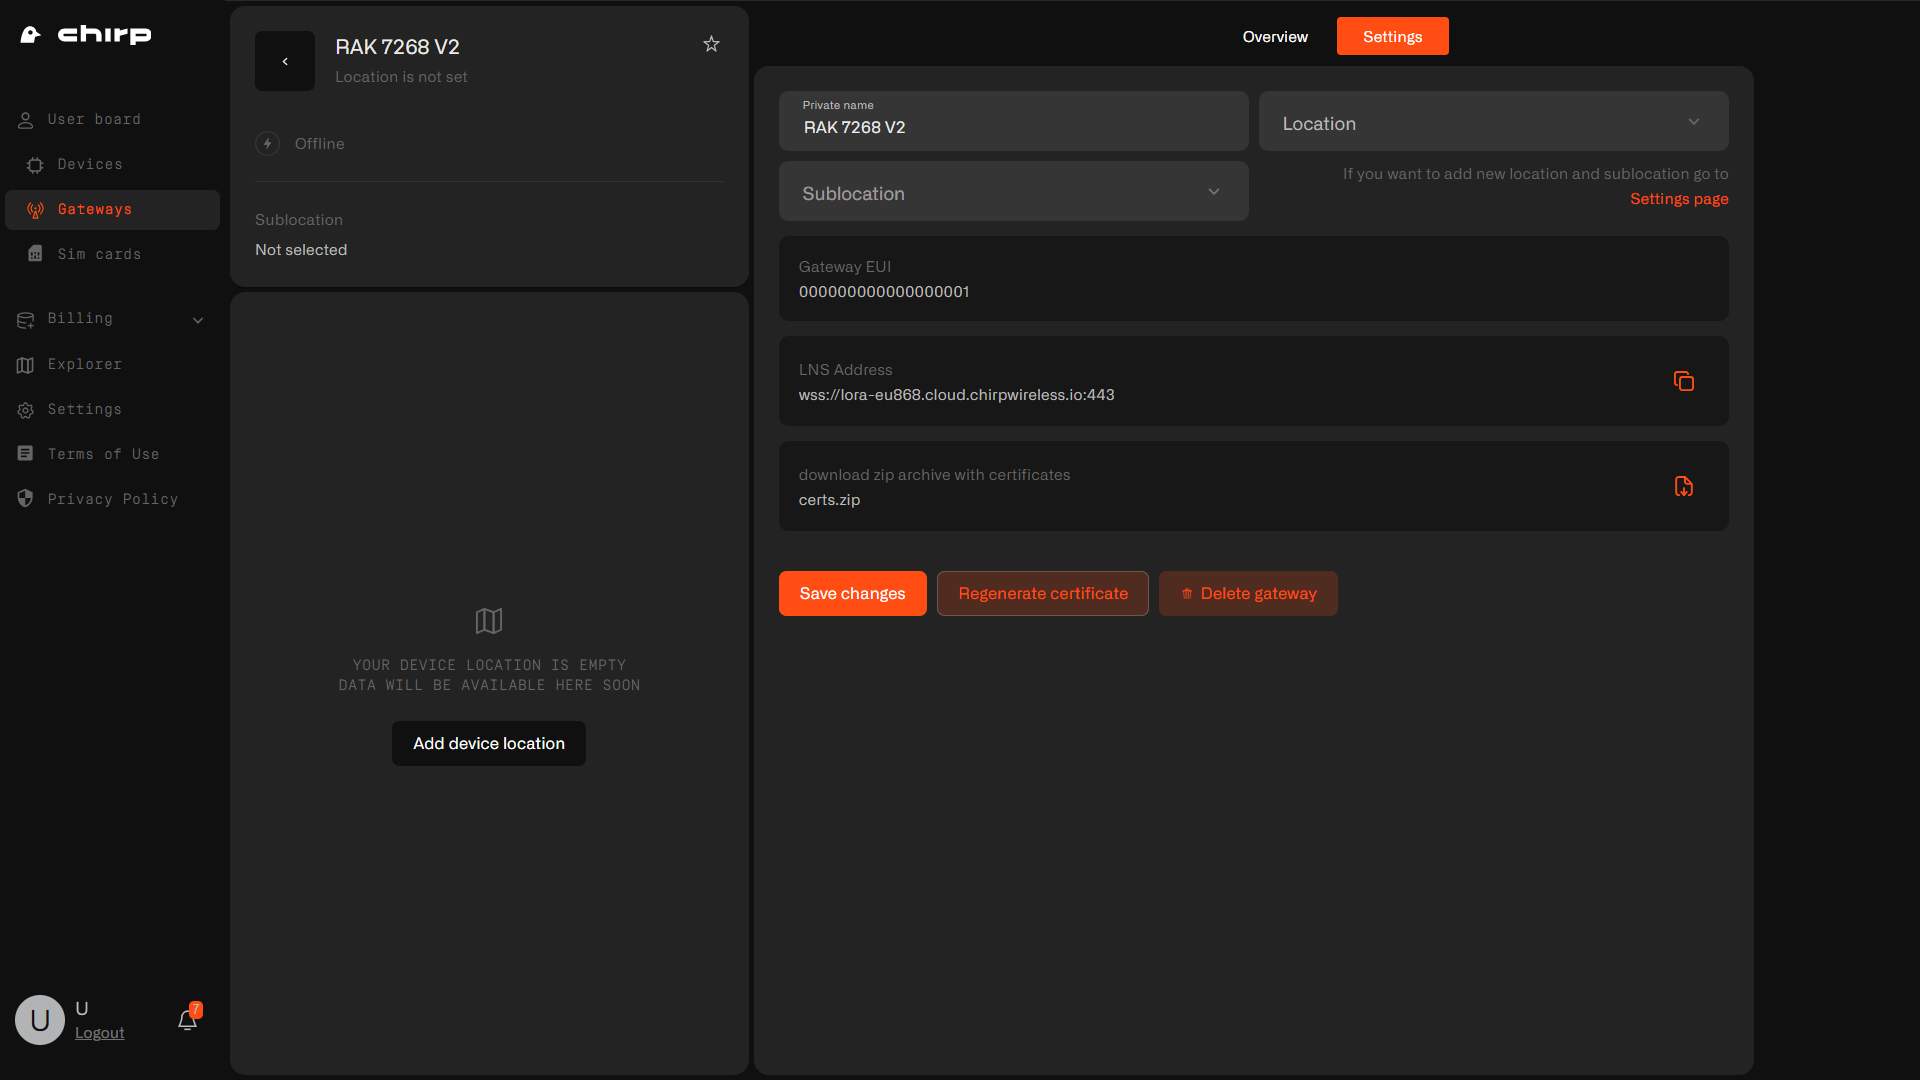
After adding the gateway, you'll receive a confirmation message. Copy and save the LNS Address, download and extract the certificates from the provided Zip file. Click Next.
Step 5
Now your gateway is successfully added to Chirp platform. Click Continue.
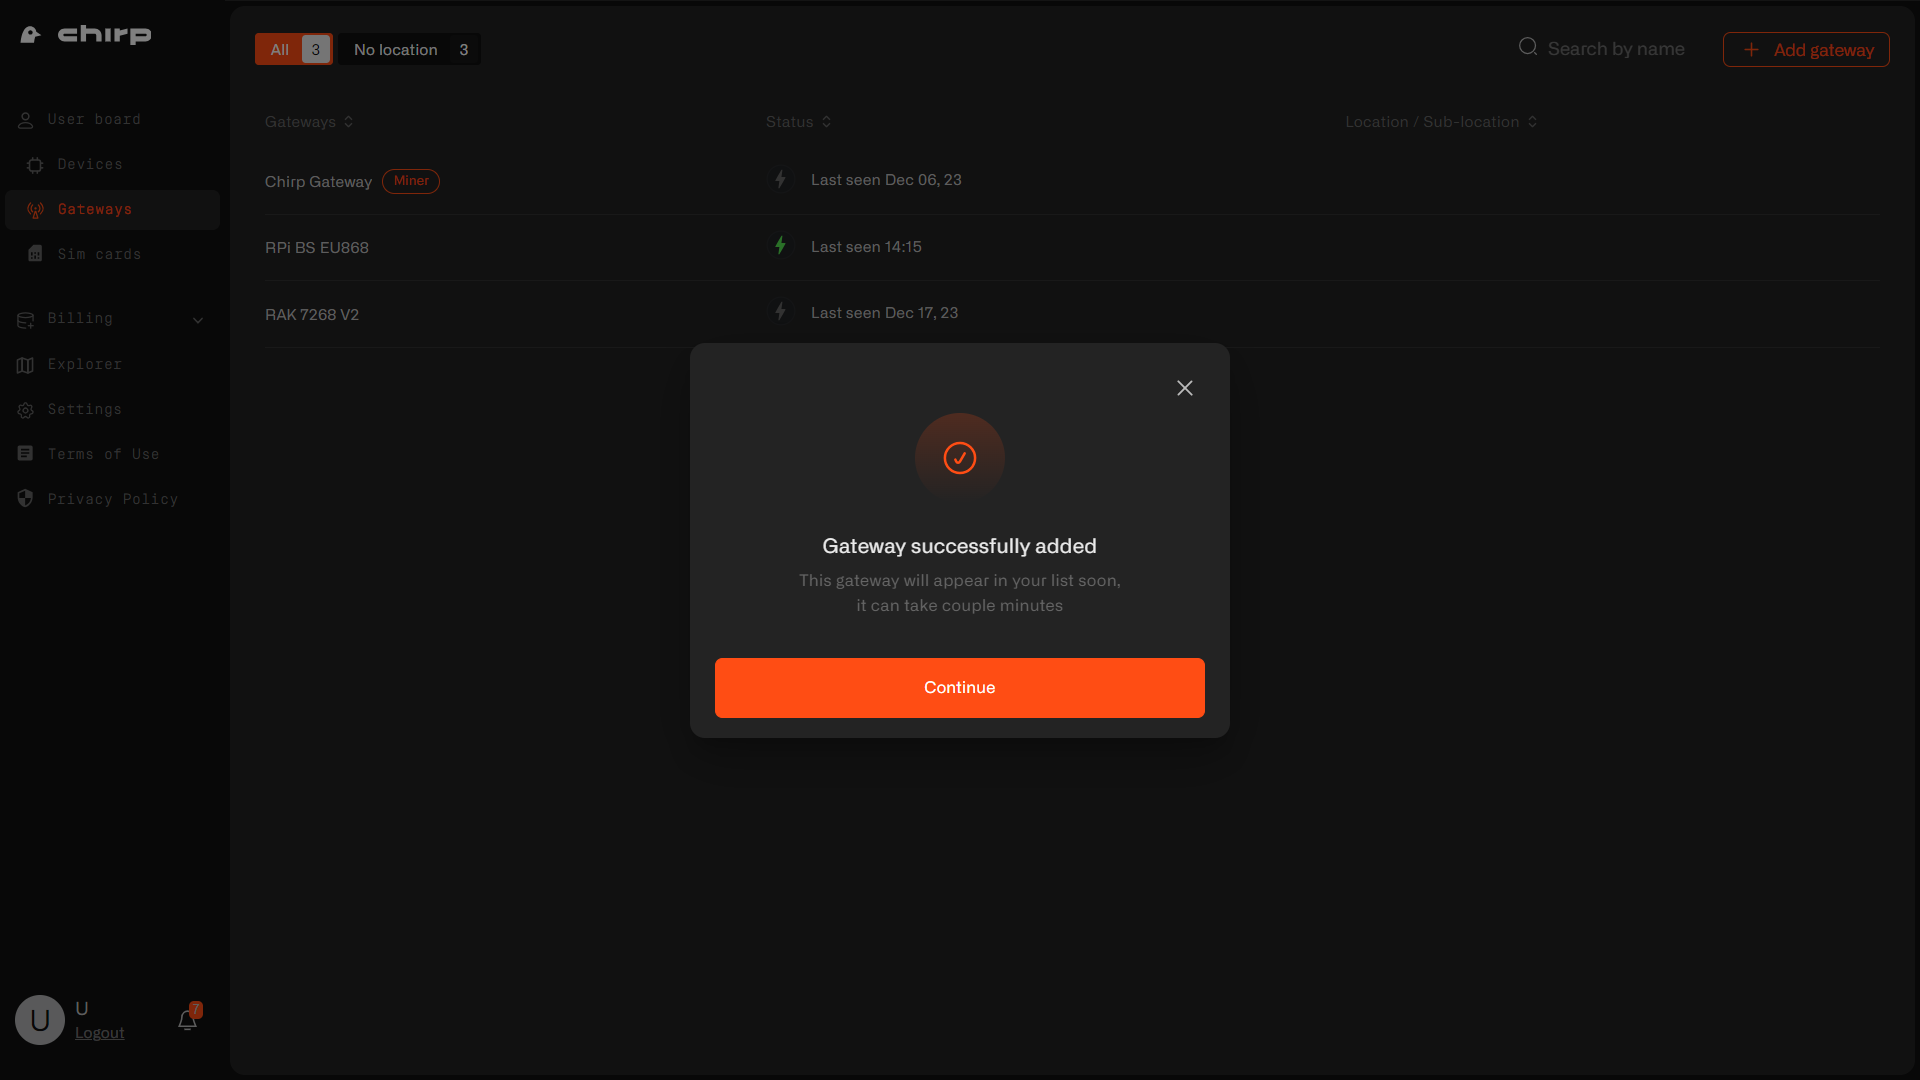
If you didn't save the certificates or LNS address, please, navigate to gateway's Settings tab.
Step 6
Plug in your RAK gateway to an electrical outlet and connect via an ethernet cable.
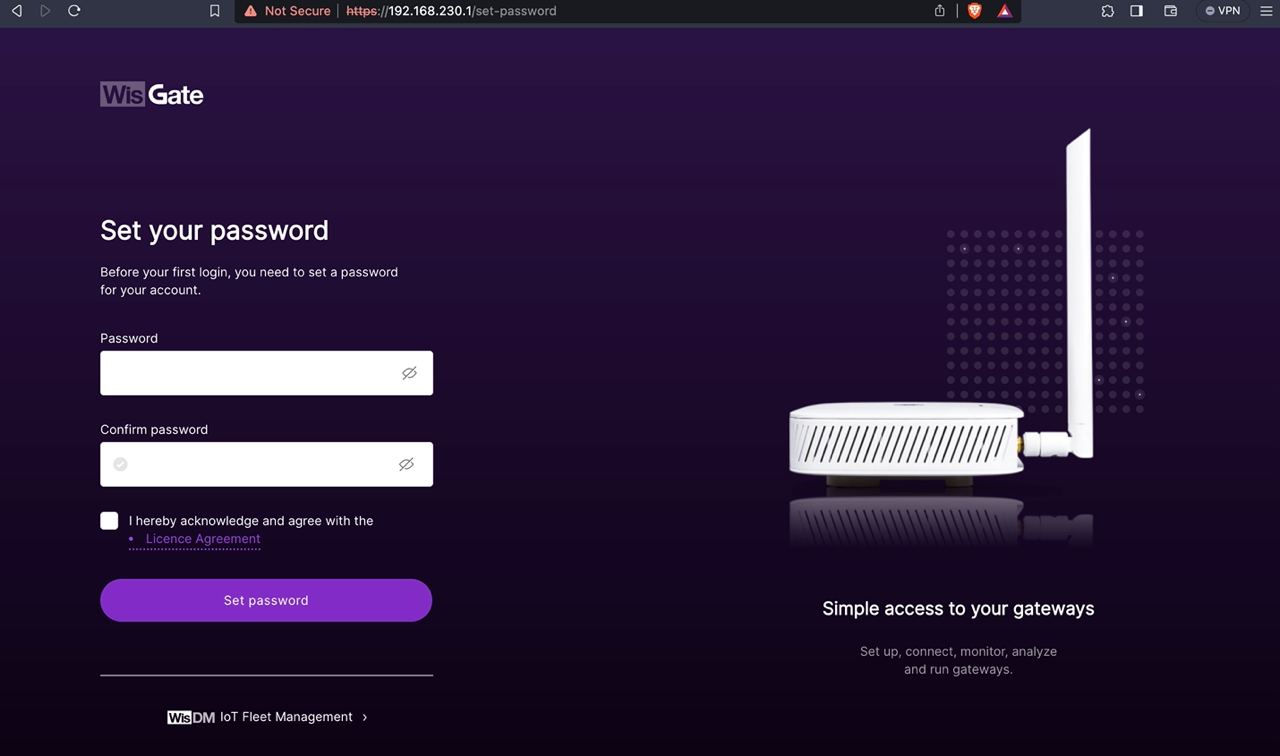
Step 7
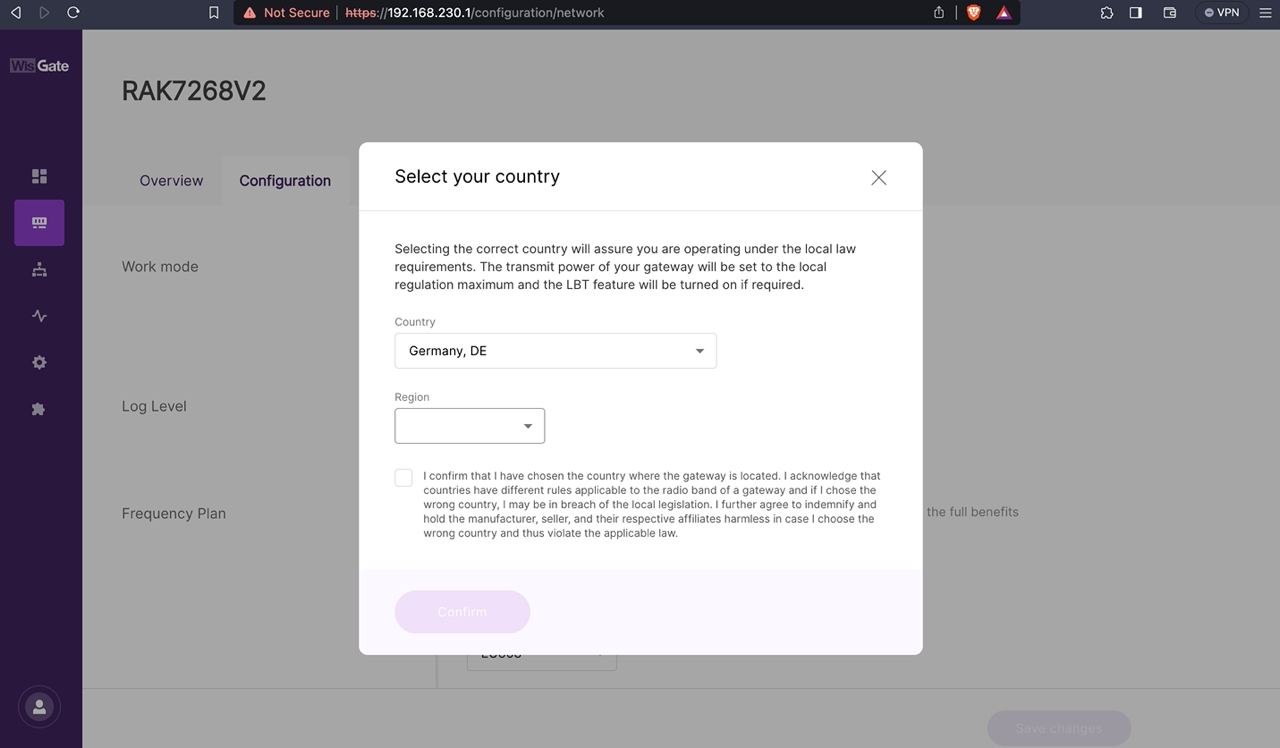
Once connected, navigate to 192.168.230.1 in your browser. Username is root and you will be prompted to create a password. Select your country and frequency band.
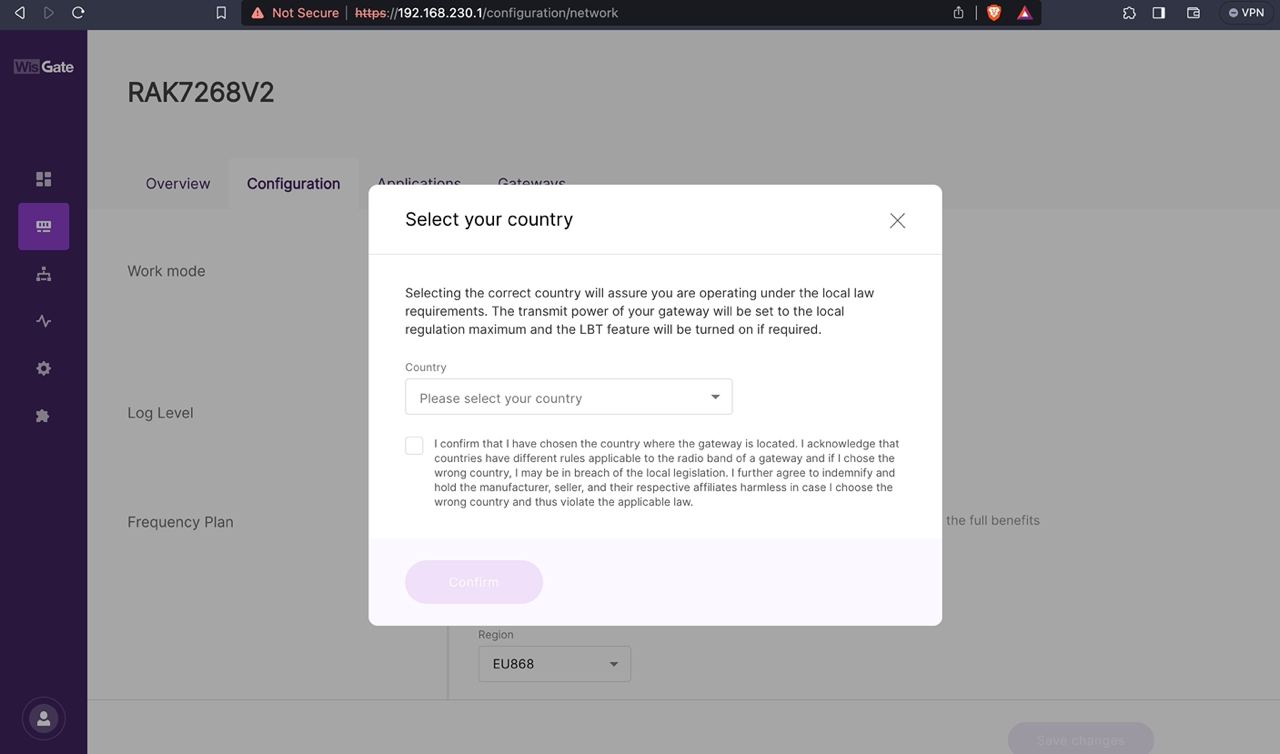
Step 8
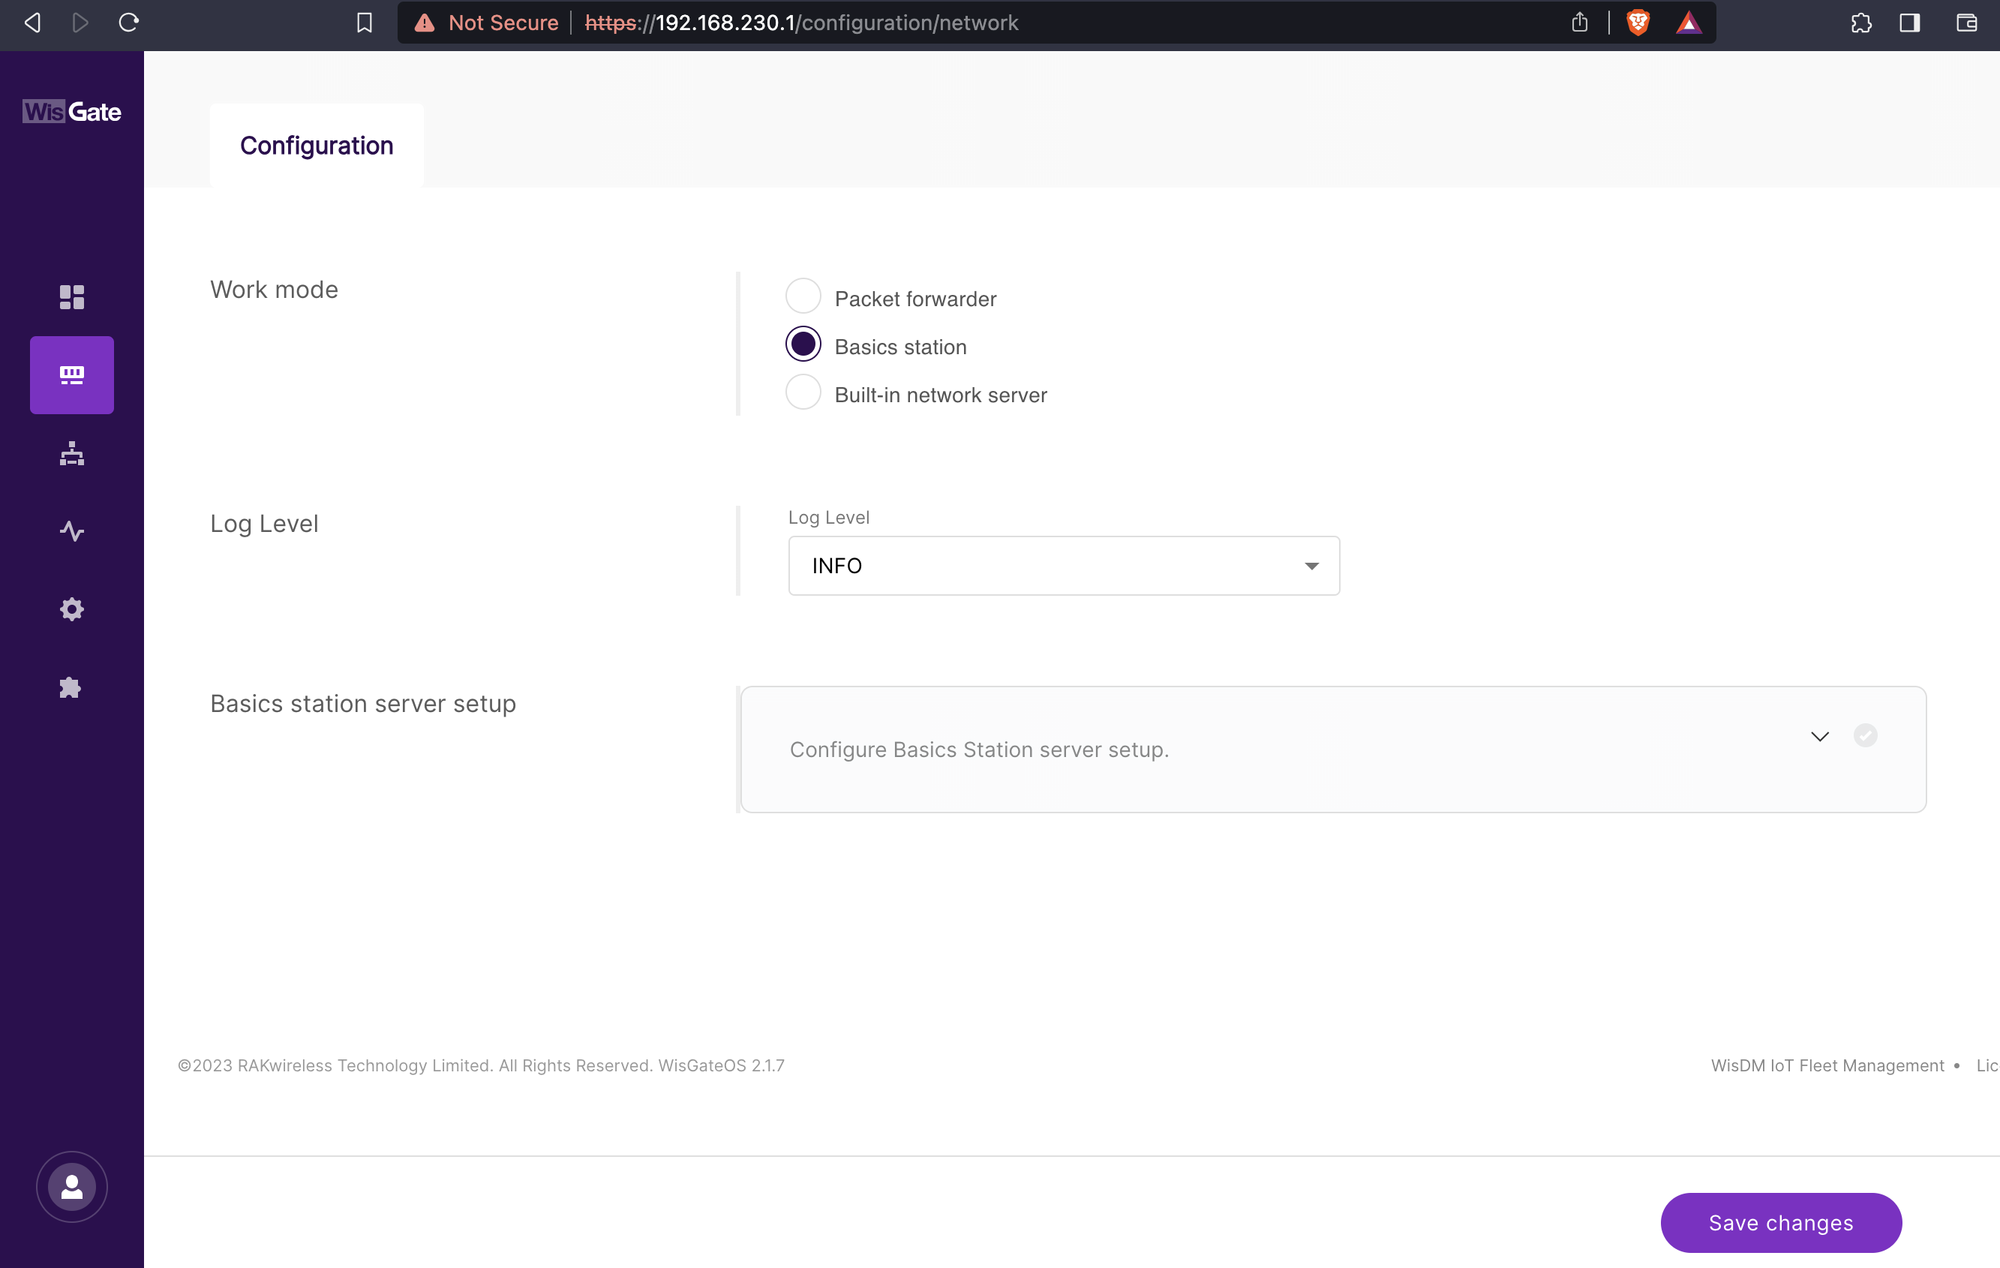
Click on the configuration tab and select LoRa Basics Station.
Step 9
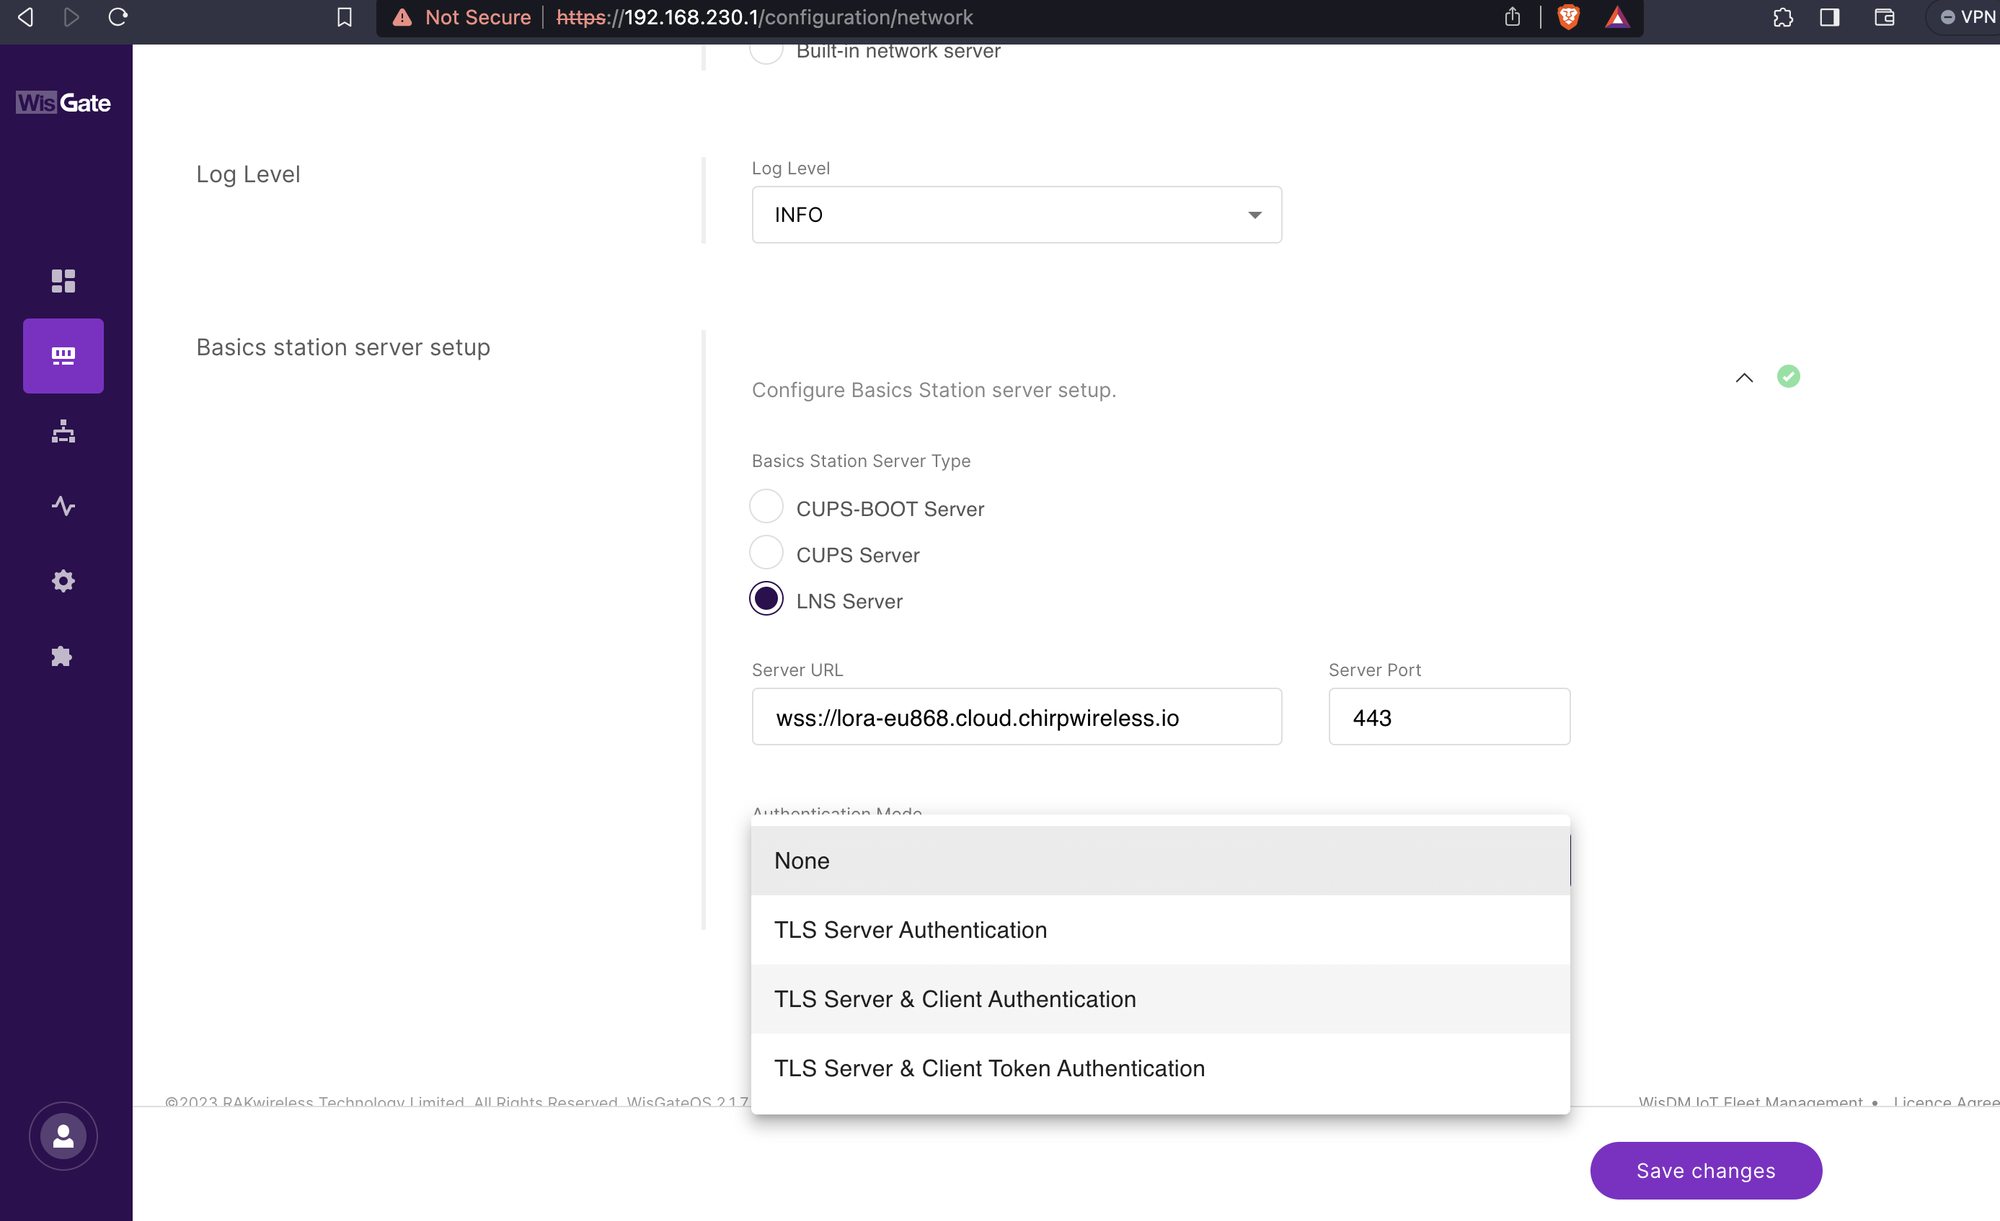
Scroll down and enter the LNS Address that you have copied during gateway registration on Chirp's dashboard
For example: wss://lora-eu868.cloud.chirpwireless.io:443
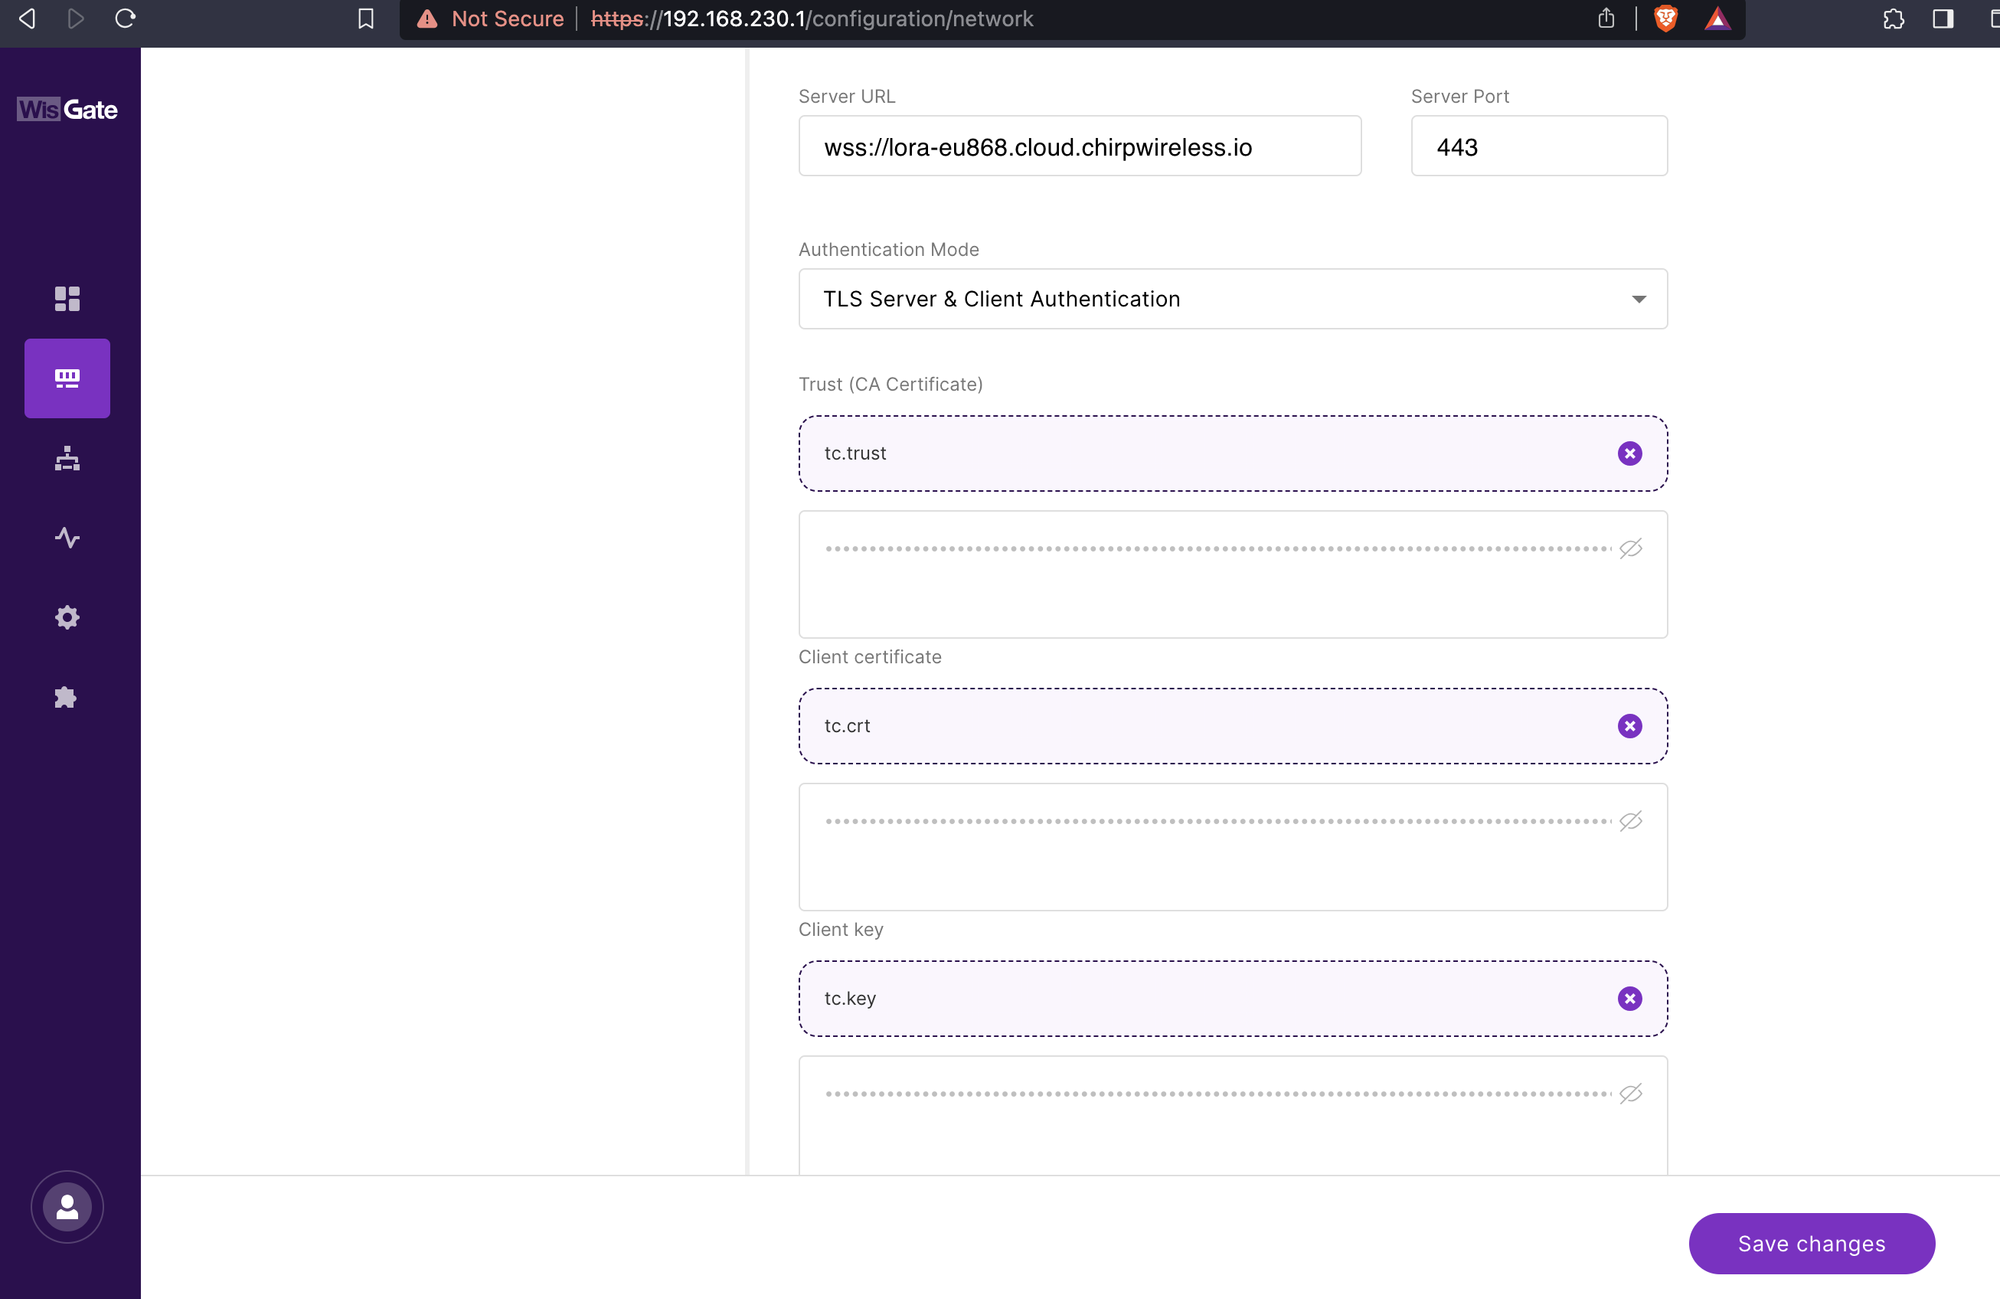
Upload 3 certificates you have extracted from a Zip file in Step 4
If set up correctly, gateways status on the Chirp's dashboard will show as online.
Congratulations, your IoT devices are now ready to be added and you are ready to automate!